Home        T-Shirt DIY's     Re-Styles      WobiSobi DIY's        Videos 

Saturday, August 13, 2011

New Red Leather Clutch, DIY.


My trip the last week was so wonderful, that I hated to leave.  But as we all know, wonderful sometimes have to come to an end to make room for more wonderful!  I want to thank my Brother and Sister In law for being such gracious hosts, and for renewing my spirit that was running on empty.
As promised I am doing a tutorial on the new red clutch I made. It is an easy, no sew, DIY.
I have to inform you~ that I have become obsessed with making leather clutches.

Tutorial
Things you need
and
E6000 Glue

1. Cut your leather
there will be two pieces. the bottom piece will be 14 inches by 13 inches
the top piece  will be 9inches  by 13inches
2.  Fold the bottom piece in half and glue down the sides.
3.  Punch holes down each side.  be sure to make an even number of holes.
4.  use your leather cording and lace up both sides. Tie knots and place a little glue on the knots.
 

5. Take the top piece and glue it to the bottom piece.
6. Add your snaps instructions for them HERE

I cut 3 strips of leather and braided them to make a small handle that I attached with leather cording.
Let this sit for 24 hours to let the glue set up.


Now you have a new clutch!
Of course I had to add tassels. 
If you need any extra help please email me,
Wobisobi @gmail.com
Have a wonderful Saturday
<3
Anne

Thursday, August 11, 2011

The Wall


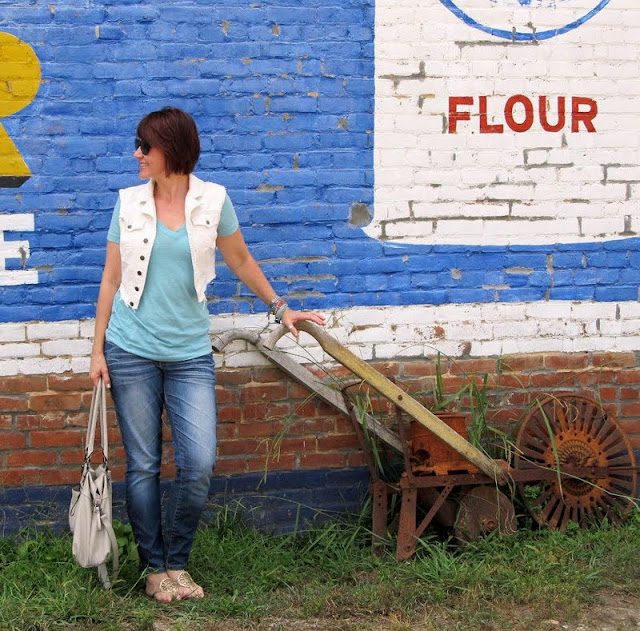
My sister in law and I went on a little adventure to get some shots of this amazing wall that I saw the other day. Of course, all around where I am right now are wonderful antique shops, quaint restaurants and scenery to die for. It makes you want to drink some sweet tea, rocking in a rocker.  This Wall and another red and white checkered wall, were so beautiful I had to have myA take some shots for me.. 
Thank you A, for doing such a fantastic job.. 


Shirt -Target
Vest -I made HERE
Ankle zip Jeans -Marshall's
Purse- Target
Gold sandals - American Eagle
Cat eye Sunnies -Target.

Have a wonderful Thursday!!
<3
Anne

Wednesday, August 10, 2011

Between A Rock

If you could have seen me setting up these shots and running back and forth on top of this rock, I think all of you would have laughed. -The 6 inch heels didn't help much-   I was afraid  that I did not get one shot that was good.  But despite all the teetering on  the rock, the chiggers and the over exposures,  some of the shots turned out useable.( with some tweaking).


And  I want to introduce you to the newest addition to my leather clutch family, that I made this week. 
Hopefully a tutorial will be coming soon.
Have a wonderful Wednesday.
<3
Anne

Monday, August 8, 2011

Project Re-Style #31 Wrapped Bracelets

Happy Monday Everyone!  
My Re-Style this week is going to be pretty different-jewelry.  A wrapped bracelet out of a fan chain.   I am  jumping into new waters this week by doing a video to show you how I made it. This is a trial run in my video making.  I hope it is easy to follow and that after you watch it you can make your own wrapped  bracelets!
These bracelets can also be made with rhinestones, and silver bead chain.
 as seen on Honestly WTF and I Spy DIY


 Tutorial
Things You Need
1. Leather cord 
2. I used braiding cord
3. Scissors
4. Pliers
5. Rhinestones
6. Fan chain
7. Silver bead chain
I had just a little trouble uploading the video so it is rendered in a lower quality.  
When I get home I am going to up load it in HD.
This is my first real video-kind of scary!

As always  all the details about Project Re-Style will be at the end of the post.
If you have any questions,
Please Email me.
Wobisobi@gmail.com


31 down 21 to go

Click on the picture for all the details about
Project Re-Style.
Have a Marvelous Day!
<3

Sunday, August 7, 2011

Sunday Fun!

Recipe for a fantastic Sunday.

  
Number 1- An Amazing view!


Number 2 -Great food


Number 3- Making things.


 and Number 4 - 
Finding a , fun, new, polka dot, Scarf.


 Wow-  almost everything I have on is from Target.
Don't you just love Target?
Shirt restyle -you can find HERE.
I hope your Sunday was fantastic too.
<3
Anne

Saturday, August 6, 2011

Fashion Class #4

Well, this last week of the fashion class I was teaching went by so quickly.  I can hardly believe that  the month is over.   This  class, like all the rest, was  full of amazing and talented young people.  I want to thank each one of my students for always opening my eyes to new ways of seeing things. These beautiful young people always have an open and unbiased view of life.  It is so refreshing! I have had such a wonderful experience doing this.   I hope I will be able to do it again next year.

 Left to right.   Isabel, Ambree, Ashanti, Quantasia,  Brianna


 Brianna's shirt for this week
 Discussing fashion, of course
 Quantasia working on one of her shirts.
 Brianna and Ambree


This was our wrapped bracelet DIY day.  They all made such great bracelets.
Isabel did an awesome leather wrapped Bracelet that ties in the back.

I have more pictures of their individual shirts but because I am away this week, I do not have access to them on my lap top.
But, I promise when I get home I will  post them, maybe with a quick DIY on how the students made them.
For another surprise.  I am traveling this week  and I will be posting all of my fun adventures. Hopefully you will find them as inspiring to see as I do. 
Have a wonderful Saturday night.
<3
Anne


Friday, August 5, 2011

"What you do today can improve all your tomorrows." Ralph Marston

Isn't that a  wonderful Quote by Ralph Marston?. What a perfect quote to kick off YOUR perfect weekend.
Ralph Marston was born in 1955, and he is a writer and a motivator. I think all of us need a good motivator every  now and then.  I also found out that he has a web sight to motivate and empower.HERE
 Speaking of empowering, red is a color that always makes me feel motivated, and happy. When I feel a little down or to tired to move, I put on red and it always puts me in that  forward motion.
What is your motivational color?

Shirt I made HERE.
Have  a wonderful Friday Everyone!
<3
Anne

Wednesday, August 3, 2011

Circle ,Circle, Dot, Dot.

Happy Wednesday all!!
I am trying very hard to keep up with my daily post, and  I know I have skipped a  day or two here and there, but hopefully after this week I will be back to the regular schedule. My last week of  Fashion class is going really well.  Everyone in the class is just amazing,and  I can not wait to show you  all of their creations.
Today I am wearing a dress that I love, but for the life of me I cannot remember where I bought it  from.  ( I  think it was from Target.) When I wear this dress,  I always feel like I am transported back into the 1940's. I guess it is the combination of the circles, the colors, and the shape of the dress.


Everything I am wearing  is from Target. Except the belt,  which  is from Wal-mart.
And the sweater is from the Gap.
Have a beautiful day!
<3
Anne

Tuesday, August 2, 2011

Project Re-Style # 30: Peep Shoulder Shirt, With Chain Detail.

Oh MY Stars,Only 22 more weeks of Re-Styling left. The velocity that my weeks are going by is almost to fast  for me to bare. Tonight I am going to make this a pretty quick post, only  because my comfy bed is calling me and I have a longgggggggg day ahead of me tomorrow. 
So lets get down to brass tacks.
All the details about Project Re-Style will be at the end of this post.


Week number 30 
I just can't hardly believe it.
This week another t-shirt I has succumbed to my scissors.
This one I added chain to and cut out the shoulders.
 Tutorial
Things you need

1.  A Large Shirt
2. Scissors
3. Chain
4. 6 jump rings
5. 3 lobster claw hooks
6.  Needle and thread
7. Chalk
 1. Mark with chalk where you want to cut your shirt.
2. Mark on you shirt where you want to hook the chain.
then sew the jump rings on to the shirt using a needle and thread
 3 .To Make the chain piece that you are attaching to the front of your shirt~ start by connecting the chain to  three jump rings. Draping the chain.  You could do any design here.
4. Add your lobster claws hooks to your three  jump rings.
5. Then attach the hooks to the three jump rings that you sewed onto your shirt.


And that, my friend ~ is it.


H was so nice to model for me


I think this would make a great dress or thrown over some jeans. Plus you can take off the chain when you want to wash the shirt.


30 down 22 to go
  
Thanks H belle, <3 U

I hope you all had  a marvelous Monday!

Nighty, night everyone.

<3

Anne


Monday, August 1, 2011

Teal and Red

 I am Trying to squeeze a quick clothes post in before tonight's re-style.
Teal and red together make me think of a beautiful sunset on the Caribbean. Cool teal with  vibrant reds,  scream," We belong together."


See you tonight for for My Project Re-Style#30
<3
Anne