Home        T-Shirt DIY's     Re-Styles      WobiSobi DIY's        Videos 

Thursday, November 29, 2012

Liquid Gold Shoes, DIY

These shoes where re-styled with gold leaf paper first. To see that go   HERE.
Now it is time to re-style them again and this time I am using gold leaf paint. 


 Tutorial
 Things you need
  1. Shoes
  2. Golf leaf paint  Plaid, Here
  3. Q-tips

 Clean your shoe with a damp cloth 


Shake up your gold leaf paint,
 using a Q-tip paint your shoe.
I used this same gold paint on my gold spiders. HERE
 Let dry about 6 hours


New life for my old friends.

Have a wonderful Thursday
Lots of <3,
Anne

Monday, November 26, 2012

Draped Shirt Vest, DIY

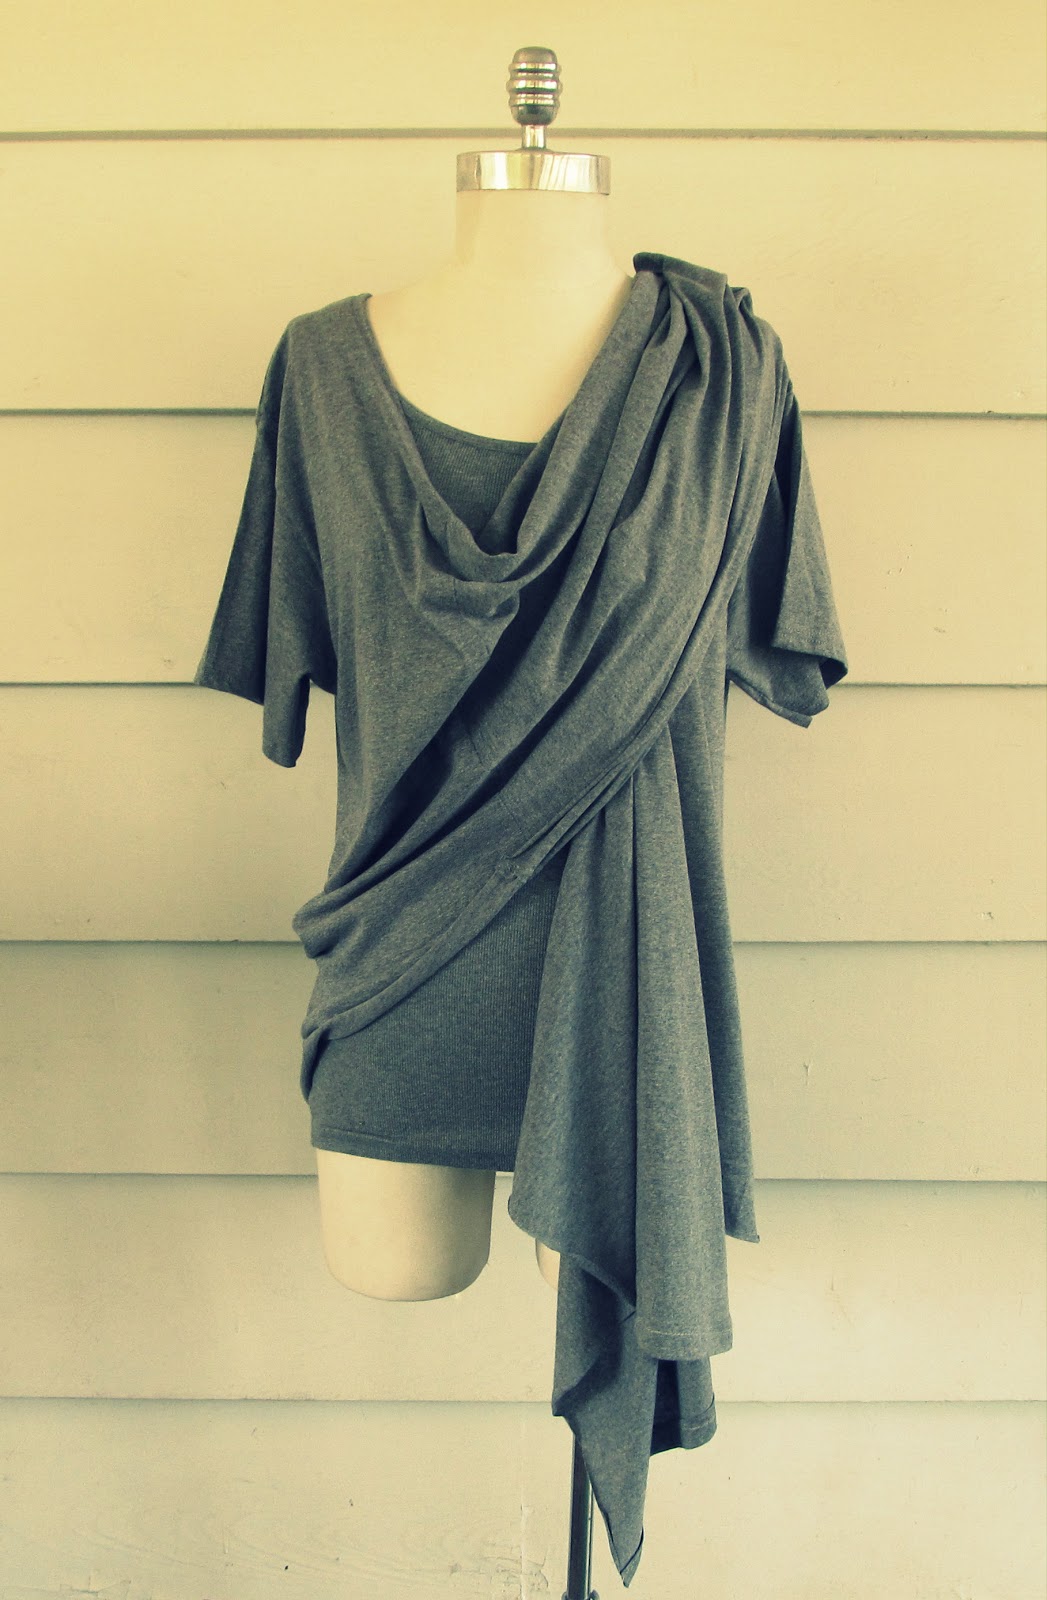
I have had so many  emails wanting me to make a draped shirt vest with sleeves, out of a t-shirt or a long sleeve tee.  I have finally made this one out of two short sleeve t-shirts, but if you wanted to make a draped shirt out of two long sleeve t-shirts, it would work the same way.
Although my first draped vest required no sewing,
 this does require a basic straight sewing stitch.
or a serger, if you have one.

Tutorial 
Things you need
  1. Two t-shirts *I have one medium mens and one large mens.
  2. Scissors
  3. Sewing machine
  4. Grey thread
  5. Straight Pins


#1 
The mens medium shirt
A. Cut off the collar
B.Cut  a straight line down the middle of the mens medium shirt. Only the front layer.


#2 
The mens large shirt
A. Cut off the arms,
B. Cut a straight line right below the collar
C. Cut a straight line down each side of the shirt. Your intention is to make two rectangle pieces.


 #3
A. Take one of your rectangle pieces and putting right sides together pin it, then sew it to one side of    your shirt.
     Do the same to the other side.
B. Trim the bottom of the shirt to match up with the part that was sewed on.

 # 4
Hem the top edge all the way around the collar and down the other side.


The two rectangle pieces make the perfect drape.


Wrap it.

 Tie it.


Back

Wear it


For my other 5 minute draped vest
 head HERE. 
I hope this answers some of those Emails.
Have a wonderful Monday.
Lots of <3
Anne

Wednesday, November 21, 2012

Silver Metallic Jeans, DIY


Metallic jeans have been all the rage lately
Why not make your own.
I just had to DIY a pair.


Inspiration
$240.00

Tutorial
Things you need.

  1.  Jeans 
  2. Scissors
  3. Tulip Silver Metallic Fabric paint *Michaels or Ilovetocreate.com
  4. Brush
  5. Water
  6. Plate
I used my favorite jeans and I cut my jeans to the length of that pair.


 I dampened my jeans.  You can spray them with water, 
or just get them wet and squeeze out the excess.

 Put your paint on a plate and have a little extra water ready to mix with the paint to thin it out.


 thin out your paint a little with water.


 Paint your jeans.


Paint  both sides with paint..
Hang dry. 
Mine took about 12 hours to dry.
Wait about 4 days to wash. Hang dry.
They feel a little like leather and a little stiff at first but I love them..


 More DIY Metallic jeans HERE.
 

Happy Thanksgiving to all of you.
May it be filled with laughter, family and joy.
Lots of <3,
Anne

Thursday, November 15, 2012

Leather Bow Bracelet, DIY

I love Bracelets, so I make them more than any other accessory.
Here is a sweet little bow bracelet you can make yourself.


Tutorial
Things you need.

  1. Scrap leather Michaels or HERE
  2. Scissors
  3. Ruler
  4. Pliers
  5. X-acto knife
  6. Bracelet findings HERE
  7. Two jump rings  *Wal-mart or Michaels
  8. Clasp Walmart
  9. Pattern

Cut your pattern.
I used the X-acto knife and the  ruler for clean edges 
but scissors work too.
Above is the pattern I used.


put your end findings on the end of your leather.


Crimp them down with your pliers.

Add one of your jump rings and your clasp to one side.

and the other jump ring to the other side.

Take your bow wrong side up and place a small dab of glue in the middle.


Close it then add another dab of glue.
add the other piece wrong side up.


Looks like this.


Now your bow is starting to take place.


Place your bow on your leather bracelet.
 Using your stud and your pliers, clasp it around the leather bow and your bracelet.


to connect the two pieces.


I love leather.  
Have a fantastic Thursday.
Heading off to clean and organize for Thanksgiving.
Lots of <3,
Anne