Home        T-Shirt DIY's     Re-Styles      WobiSobi DIY's        Videos 

Monday, October 29, 2012

Liquid Gold Spiders, DIY

About a month ago I made a few Glitter Spider pins *HERE*
  for Halloween and to my surprise everyone wanted one.
 I wanted to revisit the spider pin, but this time
 I wanted them to be liquid gold, thanks to PLAID
You can put these guys pretty much anywhere you want, 
from decorating a table to
a necklace or earrings.

 Tutorial
Things you need.
  1. Plastic cupcake spiders * Michaels  6 for $1.99
  2. Liquid gold leaf *PLAID
  3. Q-tips
  4. Pin Backing
  5. Eye pins or wire * not shown
  6. Paper Towels
  7. Hot glue gun.
  8. Pliers for earrings.

Shake up your liquid gold,
Place your spider on a folded paper towel.
 Use your Q-tip and coat your spider top and bottom with paint. 
*Note I used a Q-tip for easy clean up.
 Let dry 2 hours.


 Fill the belly of your spider with hot glue and carefully place your pin backing in the glue
* be careful not to let the pin sink to far in the glue.


 To make the earrings or a necklace.
 I did this

I took my eye pin and using pliers
 I cut it the length I wanted,
bent it,
filled the belly of the spider with glue
  then  placed the folded wire in the glue,
let dry.
Add your earring finding.


Happy Halloween.
Lots of <3,
Anne

Saturday, October 27, 2012

Off the Shoulder, Triangle Stud Tee Shirt, DIY


Leftover Tee shirts?
Go create something with them.


 This is the top  half of the of the shrug I made a couple of posts ago.
Skull Necklace DIY HERE.

 Tutorial for that HERE


 Tutorial 
Things you need.

  1. Tee-Shirt
  2. Studs
  3. Pliers
  4. Scissors
  5. Ruler
  6. Chalk or pencil


Cut the bottom part of your shirt off,
 make it as cropped as you want it.


 Cut off the collar


With my ruler I drew a triangle in the top corner and bottom corner of my shirt.
* use chalk or a pencil.


  I spaced the studs about an inch apart.


I also made the arms a little tighter and held it together with one stud.


Have a great Saturday.
Lots of <3,
Anne

Thursday, October 25, 2012

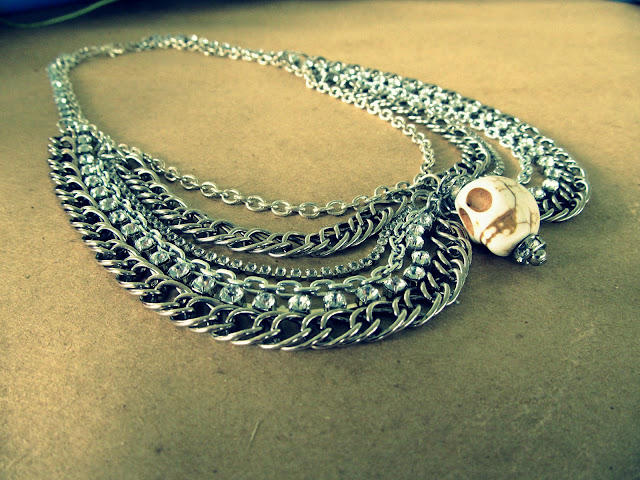
Peter Pan Collar Necklace with Skull, DIY

This is an easy version of the necklace below. 
Once you get the hang of making  the easy one
 you can expand it  however you want,
 creating your very own special necklace.


 Tutorial
Things you need.
  1. Chain* One 16 inch, two 4 inch, two 5 inch.
  2. Jump rings 8 small, 4 medium,1 small.
  3. One clasp.
  4. Pliers.
  5. Skull Bead *Optional

 Add your two medium jump rings and your clasp to the 16 inch chain.

 Find the half way point of your necklace 
and add another medium jump ring.

 Add your small jump rings to your 4 inch chains and your 5 inch chains.

Add those chains to the other medium jump ring and 
add that to the first medium jump ring.

measure out from the middle  3 inches and 3 1/2 inches, 
Do that to the other side too.
  Attach  the other end of your 4 inch and 5 inch chain.


 Then add the small jump ring to your skull bead then add it to the middle jump ring.


Which will look like this.

All done

This is the deluxe version.


I hope you all have a fantastic Thursday.
Lots of <3,
Anne

Monday, October 22, 2012

Hot Glue Spiderweb, DIY

I Wanted a quick and easy way to make a sparkly spiderweb
 to decorate coners of windows and this is what I came up with.

 Tutorial
Thing you need.
  1. Hot Glue gun and glue * not shown.
  2. Spiderweb print
  3. Glitter~ Martha Stewart Glitter is my favorite.
  4. Parchment Paper *NOTE, Wax paper does not work:)
 Spiderweb printout.
Save and  print


 Place your parchment paper over the printout.
Tape down if you want to hold it into place.


 Now trace the spiderweb with your hot glue and sprinkle with your favorite color glitter
*I did a small section at a time.


 Let cool, shake off the extra glitter, peel off your paper and stick in any corner you want.
You can use double sided tape or  
I put a little hot glue on the corners of the web
 and stuck it up on my window while the glue was still warm.
I am not sure how this will work in a cooler climate.


Have a wonderful Monday.
Lots of <3,
Anne

Saturday, October 20, 2012

Hardware Belt, DIY

While in the Home Depot the other day I ran across a few things I thought would make a great belt.
I literally could spend hours in any hardware store.
I received a few requests on how I  made this,
 so for all of you who wanted to know how I did it, 
you wish is my command.

 Tutorial
Things you need
  1. Wire cable HERE Home Depot.
  2. Wire clasp HERE Home Depot.
  3. Snap Hook Swivel Clasp HERE Home Depot.
  4. Wire cutter
  5. Screw driver


  Measure your cable to the waist size you want. 
 My hips measured at 37 inches so I cut the wire 37 inches, 
That way I can wear it around my hips.
I am sure you could always adjust it smaller if you want it waist size.

Open the clamp with your screw driver, weave the end of your wire through 
screw the clamp back down to keep the wire in place. 
This took me a little while to do,(only because it was a little awkward) so don't get discouraged.
The wire would slip out, but keep trying you will get it.

On the other side, add your snap hook swivel clasp, clamp down  the other end of your wire.

 Now you have a unique belt.


Have a wonderful Saturday
Lots of <3,
Anne